Component Management
This section covers how to install, uninstall, upgrade components in IDE and command line
In XploR Studio IDE
Install
After successful installation, the baseline IDE does not contain any resources like plugins, toolchains, example projects, and target bitfiles. So, users need to install the desired resources to start working with XploR Studio.
To install component(s) in XploR Studio, follow these steps:
- Select the icon
 in the toolbar to show a list of available components:
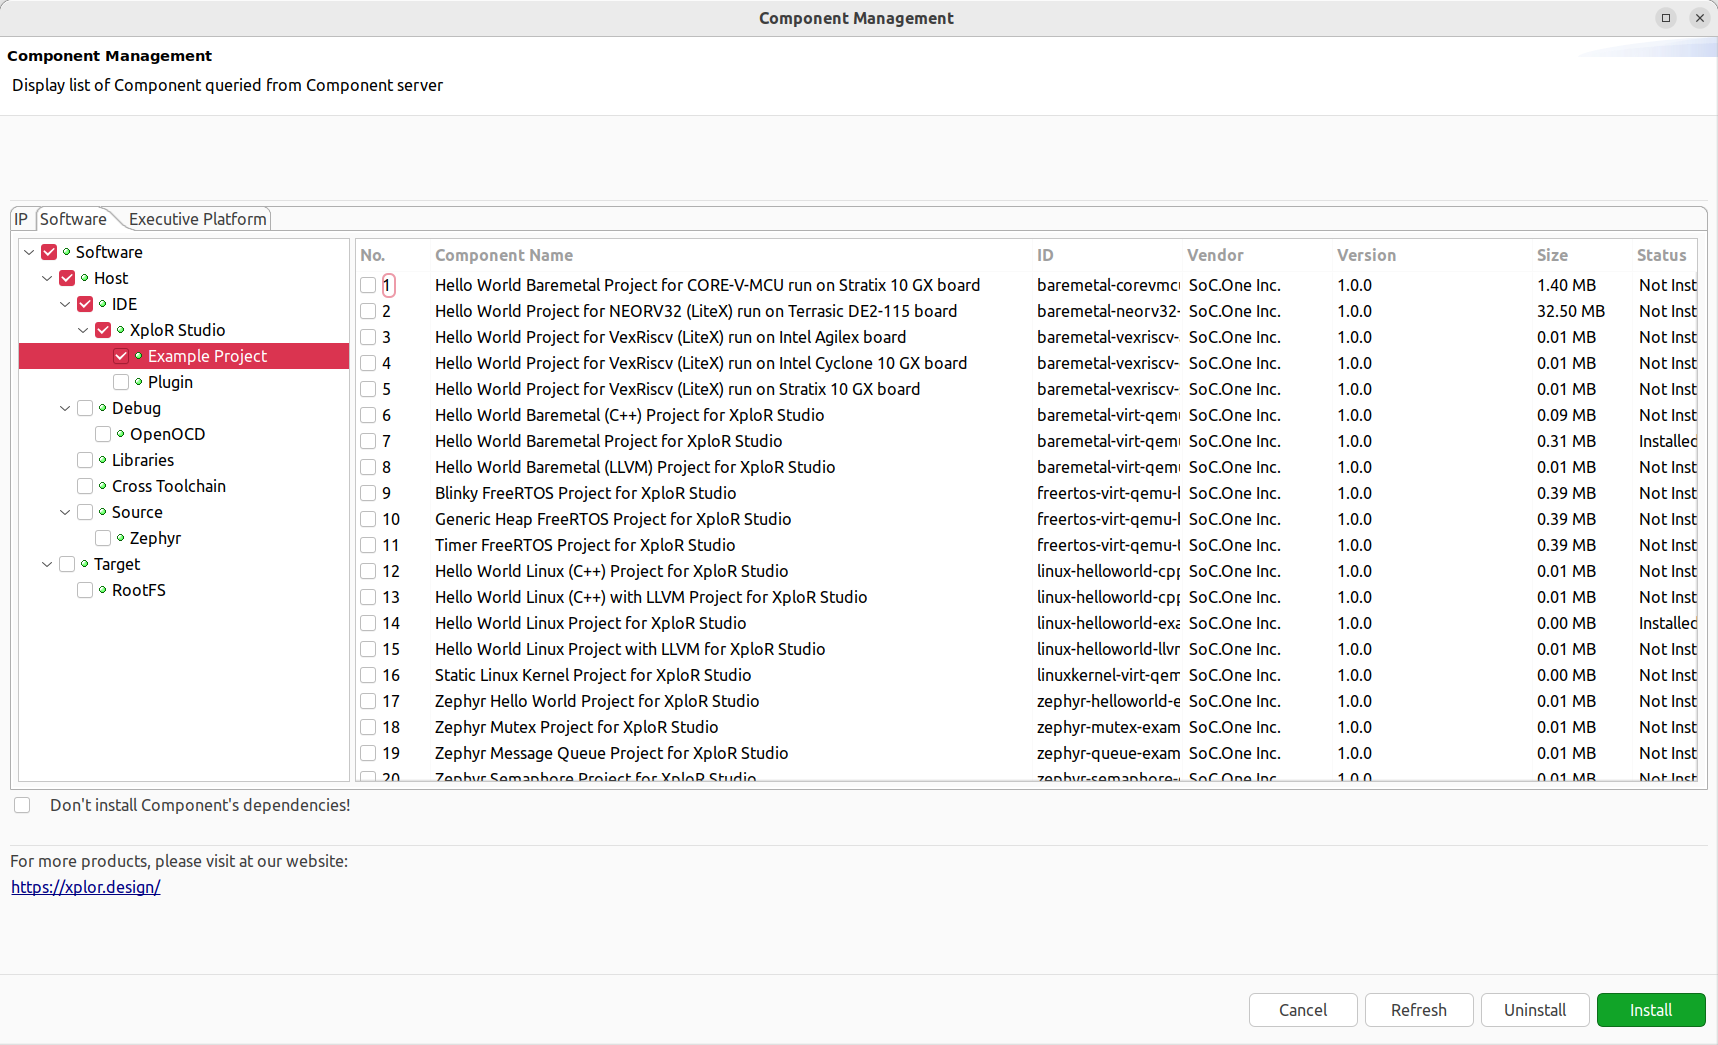
On the left side of the window, there is a filter box. User can choose to show type of components by selecting the corresponding checkbox.
To install the desired component, check the box in the No. column and select Install. One or more components can be installed at the same time.
Note:
If you do not wish to install the dependencies of specific components, please select the checkbox labeled Don’t install component’s dependencies below the components list.Uninstall
The Status column shows whether the component is installed locally. User can uninstall a component by checking the box in the No. column and selecting Uninstall. Similar to installing feature, one or more components can be uninstalled at the same time.
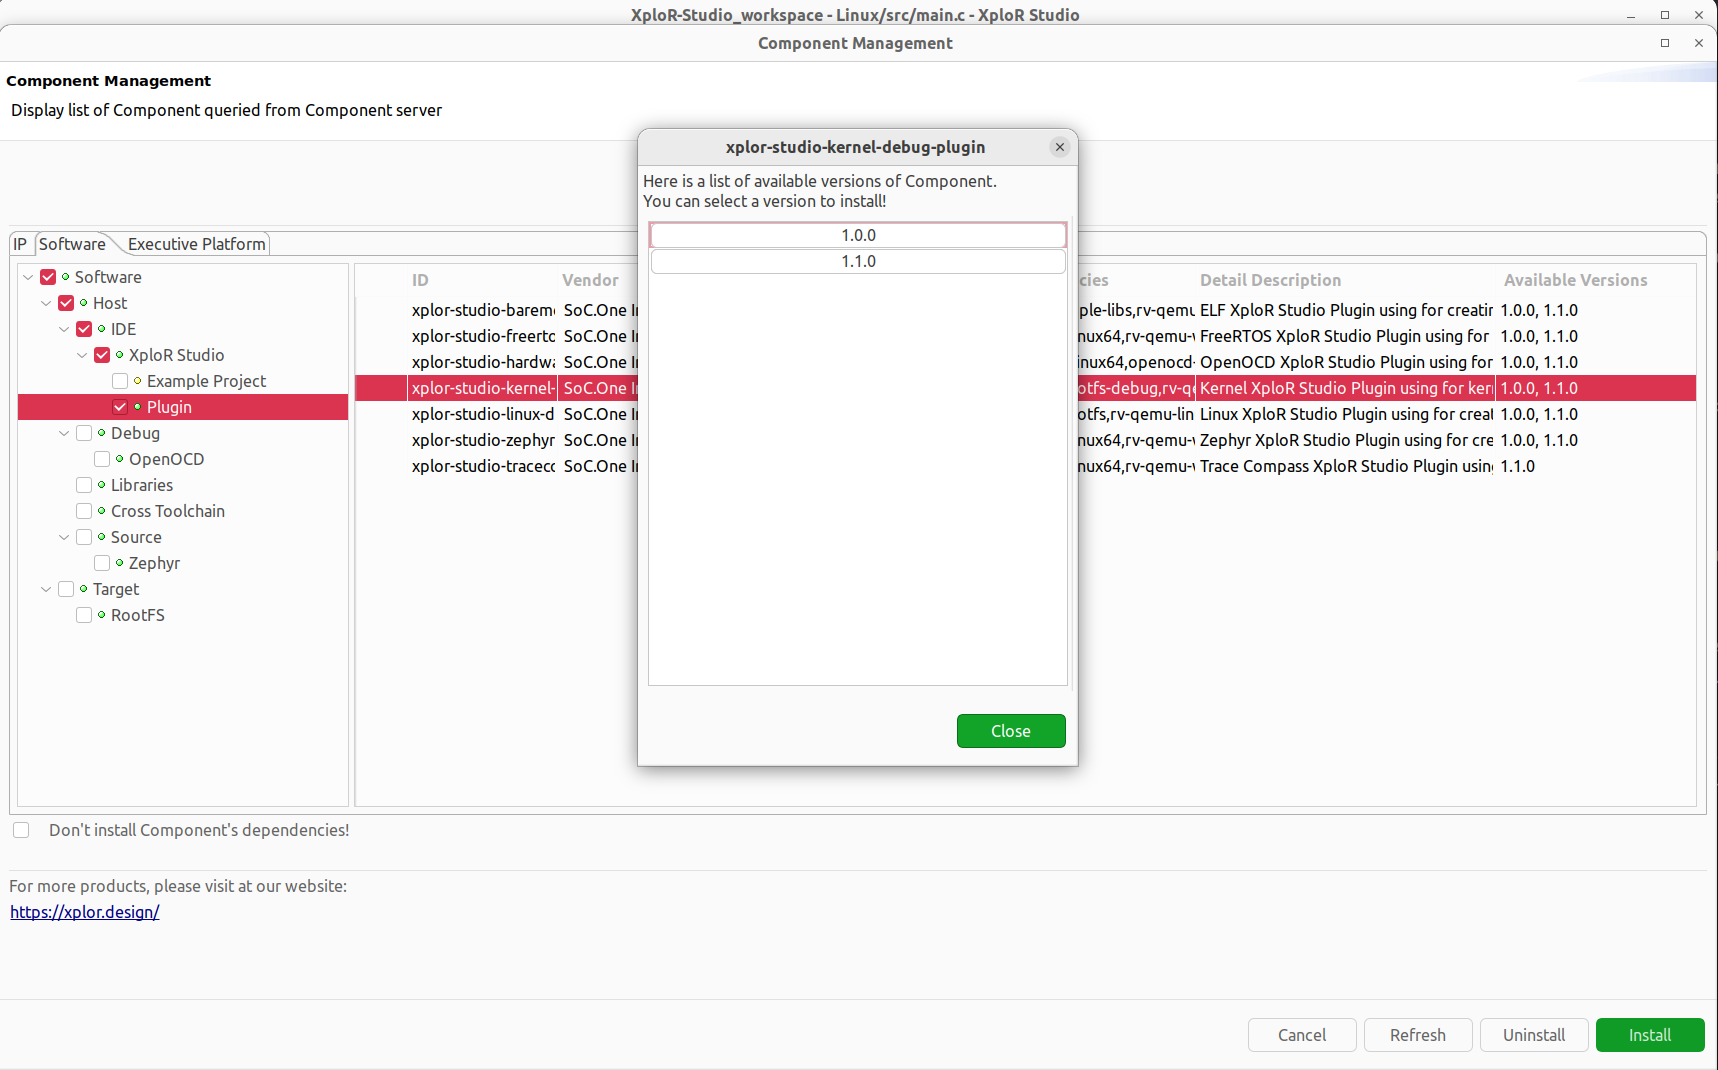
Upgrade
If a component has multiple available versions, you can select a specific version of that component by simply double-clicking on it. A new dialog will be shown to display all available versions:
In command line
Install
To install the component with command line, use xip:
xip install [component-name]
Uninstall
To uninstall the component with command line, use xip:
xip uninstall [component-name]
Upgrade
To upgrade the component with command line, use xip:
xip install --upgrade [component-name]
Or install component with specific version:
xip install [component-name]==[version]
Feedback
Was this page helpful?
Glad to hear it! Please tell us how we can improve.
Sorry to hear that. Please tell us how we can improve.