GNU C/C++ Helloworld
This chapter covers the basics of C/C++ embedded Linux projects, including create/build/run/debug embedded Linux applications. The project referred to by this chapter is called “Hello World.” This application prints “Hello World” text and runs a simple for-loop for simple demonstration. The application can also be built and run both on QEMU emulator and FPGA DE2-115 board.
Components Prerequisites
To build, run and debug Embedded Linux applications, please make sure that all below components are installed. Please refer to Component management for more information about installing component.
For debugging with QEMU emulator
- xplor-studio-linux-debug-plugin: XploR Studio Linux Plugin using for kernel debugging
- rv-linux-rootfs: RISC-V RootFS can be booted by QEMU and can run/debug RISC-V Embedded Linux applications
- rv-qemu-linux64/rv-qemu-win64: QEMU for running and debugging RISC-V applications (Baremetal, Embedded, Embedded Linux)
All above components are compulsory for debugging Embedded Linux applications. Depending on variation of toolchain, XploR Studio has 4 different Linux toolchain components:
- rv32imac-xplor-linux-linux64/rv32imac-xplor-linux-win64: RISC-V Embedded Linux toolchain 32-bit (no Float)
- rv32gc-xplor-linux-linux64/rv32gc-xplor-linux-win64: RISC-V Embedded Linux toolchain 32-bit (Double)
- rv64imac-xplor-linux-linux64/rv64imac-xplor-linux-win64: RISC-V Embedded Linux toolchain 64-bit (no Float)
- rv64gc-xplor-linux-linux64/rv64gc-xplor-linux-win64: RISC-V Embedded Linux toolchain 64-bit (Double)
Each toolchain can be downloaded separately.
For debugging with FPGA DE2-115 board
- xplor-studio-linux-debug-plugin: XploR Studio Linux Plugin using for kernel debugging
- rv32-linux-rootfs-vexriscv: The Linux images of the VexRISCV RISC-V Processor on Terrasic DE2-115 board
- xplor-studio-hardware-target: OpenOCD XploR Studio Plugin using for debugging applications on Hardware
- openocd-linux64/openocd-win64: OpenOCD binary to provide debugging, in-system programming and boundary-scan testing for embedded target devices
- rv32imac-xplor-linux-linux64/rv32imac-xplor-linux-win64: RISC-V Embedded Linux toolchain 32-bit (no Float)
Working flow
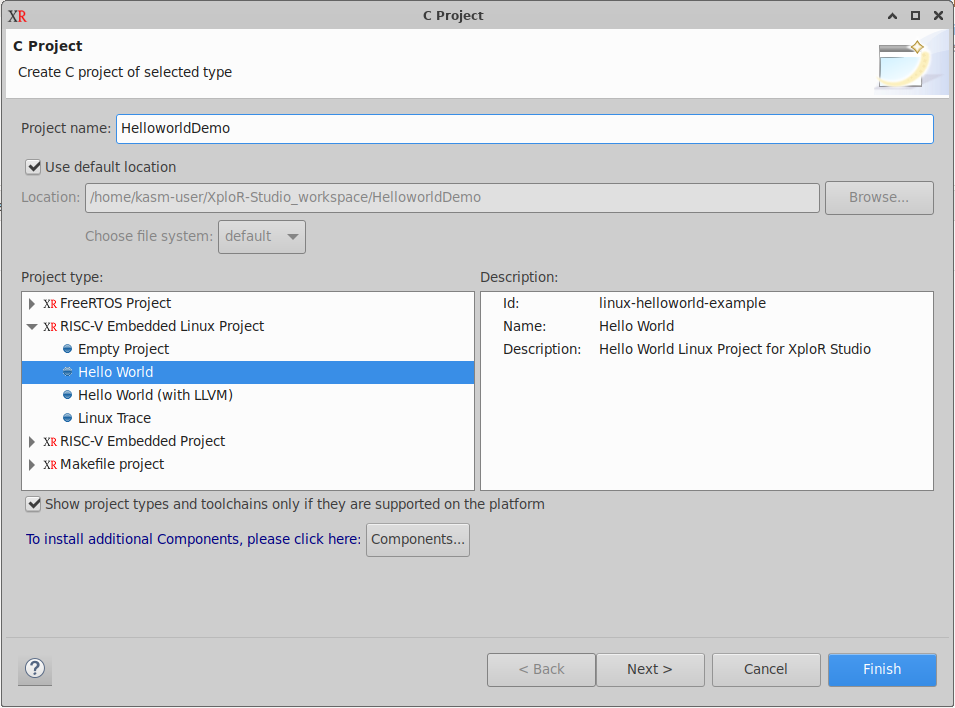
- To create a new project, select File > New > C Project choose RISC-V Embedded Linux Project > Hello World
- Other steps (building, running and debugging with QEMU emulator) are same as the quick-start project. Please refer to Quick start with FreeRTOS project for general working flow.
Working flow for debugging with FPGA DE2-115 board
Programming Bitfile
To program a RISC-V Bitfile to the board, click on Flash icon  on the toolbar
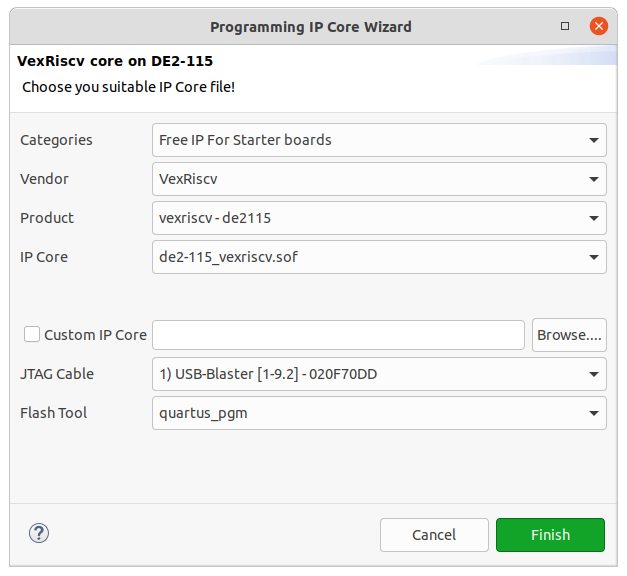
- In the Bitfile, select de2115-vexriscv32.sof or Custom Bitfile if users use their own RISC-V Bitfile. In this case, we select de2-115_vexrisc32 for the vexriscv - DE2-115 project.
- Select JTAG cable (if the user has multiple boards connected to the development machine).
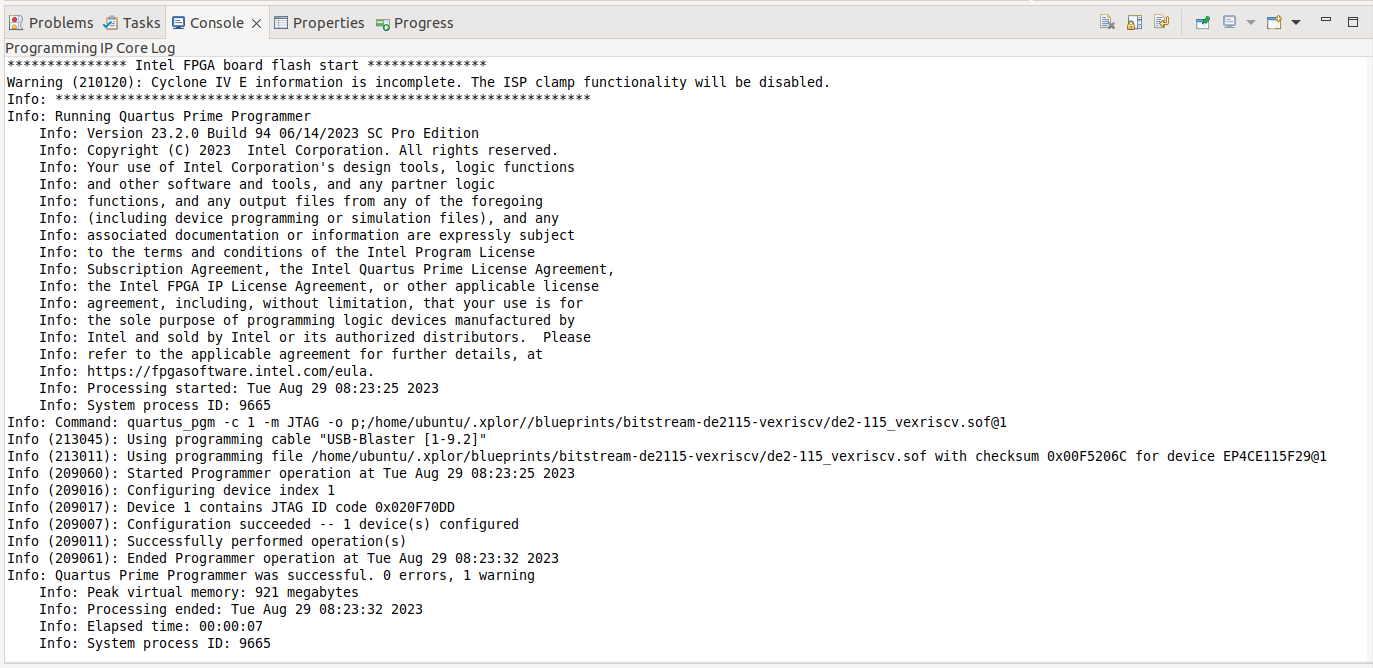
- Click Finish to flash Vexriscv 32-bit RISC-V core to DE2-115 board.
To view the console output printed from the RISC-V core, open the Terminal view and select COM port (on Windows) or /dev/ttyUSBx port (on Linux) with the following connection settings.
The output message on the serial terminal will look like this:
    _   _           _           ____         ____
   | | | |_   _  __| |_ __ __ _/ ___|  ___  / ___|
   | |_| | | | |/ _` | '__/ _` \___ \ / _ \| |
   |  _  | |_| | (_| | | | (_| |___) | (_) | |___
   |_| |_|\__, |\__,_|_|  \__,_|____/ \___/ \____|
          |___/

           Maximize your SoC design!

 (c) Copyright 2020-2023 SoC.One
 (c) Copyright 2012-2023 Enjoy-Digital
 (c) Copyright 2007-2015 M-Labs

 BIOS CRC passed (42b17cce)

 HydraCore git sha1: --------

--=============== SoC ==================--
CPU:            NEORV32 @ 50MHz
BUS:            WISHBONE 32-bit @ 4GiB
CSR:            32-bit data
ROM:            64.0KiB
SRAM:           64.0KiB
SDRAM:          128.0MiB 32-bit @ 50MT/s (CL-2 CWL-2)
MAIN-RAM:       128.0MiB

--========== Initialization ============--
Ethernet init...
Initializing SDRAM @0x40000000...
Switching SDRAM to software control.
Switching SDRAM to hardware control.
Memtest at 0x40000000 (2.0MiB)...
  Write: 0x40000000-0x40200000 2.0MiB
   Read: 0x40000000-0x40200000 2.0MiB
Memtest OK
Memspeed at 0x40000000 (Sequential, 2.0MiB)...
  Write speed: 14.4MiB/s
   Read speed: 11.7MiB/s

--============== Boot ==================--
Booting from serial...
Press Q or ESC to abort boot completely.
sL5DdSMmkekro
             Timeout
Booting from network...
Local IP: 192.168.1.50
Remote IP: 192.168.1.100
Booting from boot.json...
Booting from boot.bin...
Copying boot.bin to 0x40000000...
Network boot failed.
No boot medium found

--============= Console ================--

litex>
- The Ethernet connection is needed only for debugging embedded Linux RISC-V applications on the DE2-115 board.
- There are two built-in SoC SOFs on XploR Studio to flash DE2-115 for embedded Linux applications:
- One for MII network mode where speed is 10 Mbps
- One for RGMII network mode where speed is 1000Mps
- Development PC IP address: 192.168.1.100
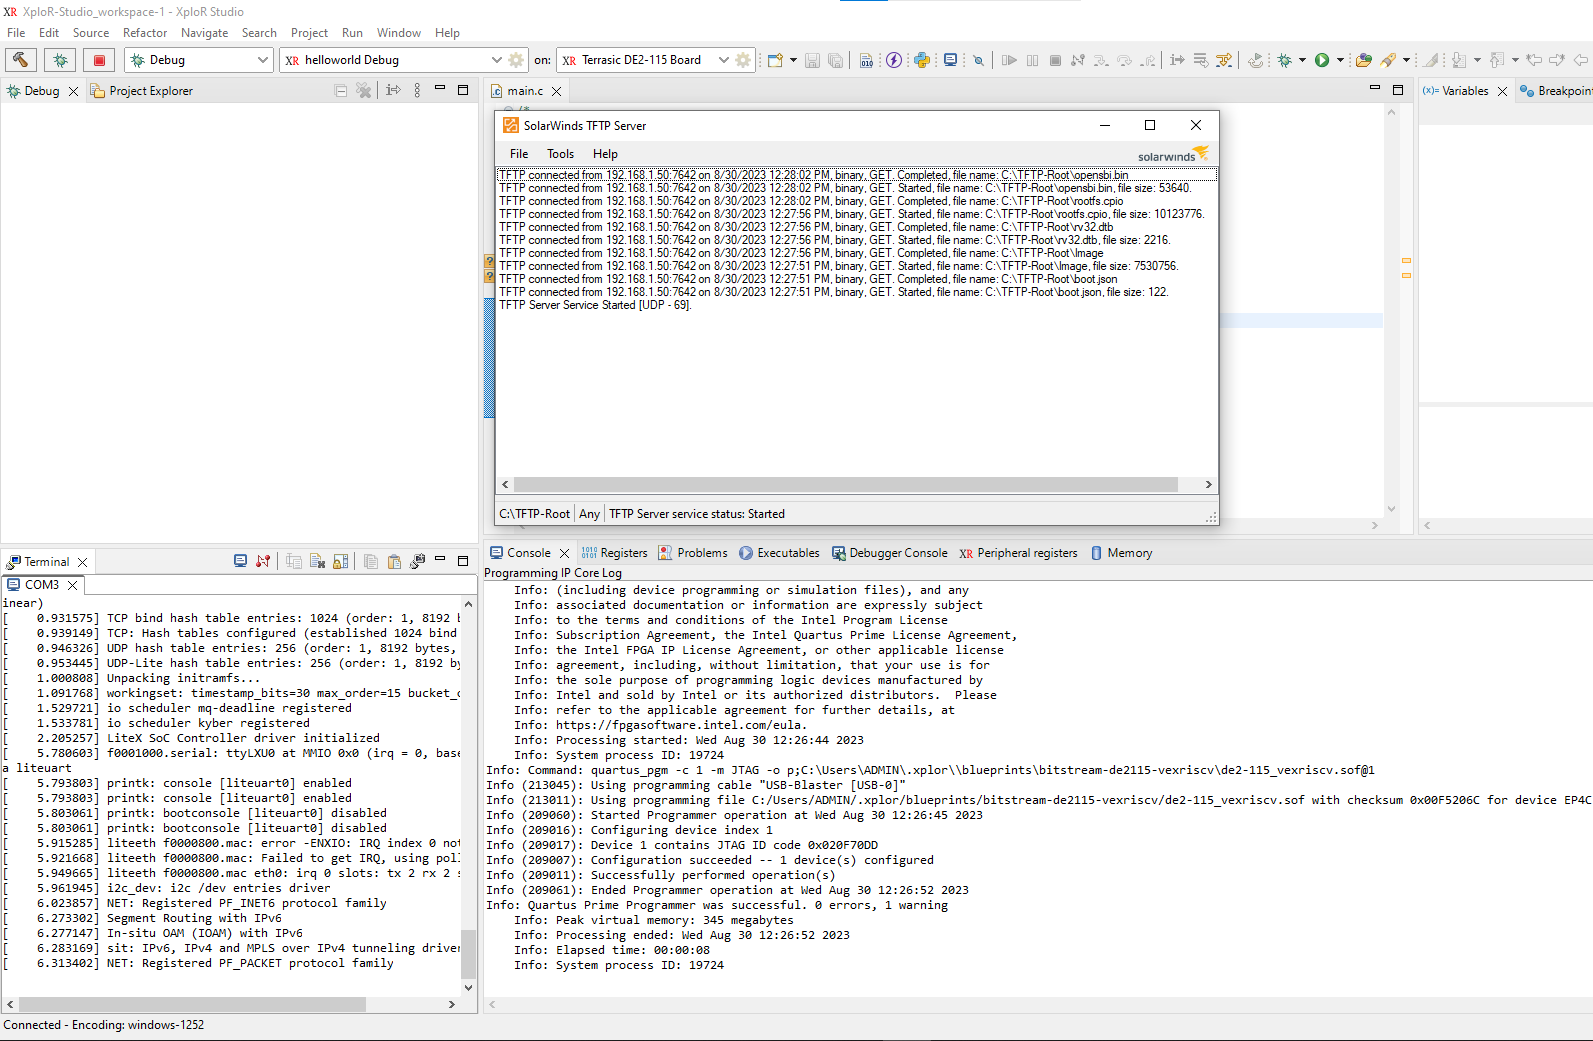
- The TFTP server is running the development PC and serving Linux image
Booting Linux to DE2-115 board
In Serial Terminal, if you see:
    Booting from network...
    Local IP: 192.168.1.50
    Remote IP: 192.168.1.100
    Booting from boot.json...
    Booting from boot.bin...
    Copying boot.bin to 0x40000000...
    Network boot failed.
    No boot medium found
That means the Linux kernel cannot be booted correctly. So, please do the follow steps in here.
If output as follows, that means Linux be booted properly:
    Starting Dropbear SSH server: Waiting for kernel randomness to be initialised...
    [   14.144009] random: crng init done
    Generating 1024 bit rsa key, this may take a while...
    Public key portion is:
    ssh-rsa AAAAB3NzaC1yc2EAAAADAQABAAAAgQCMeX37iv5Hw5MadvVwd+UIVeSIx1QecoV8OiPOt65obbokDxvaol0PsfCHBi0h23zxhhzUHizKDAu9fJ7gQVLWfHjcGKA4x4XuY8O3TasjnzpAntjXgWcBOpw3zpM46skOl65zfJqq6AIH14IzCqs+VDUE2dKjv+4mRbiX3A5Ovw== root@de2-115-vexriscv32
    Fingerprint: sha1!! 5a:9f:05:35:11:2c:e2:e1:b8:71:a4:8e:f5:a3:8a:1d:76:b6:f2:ff
    dropbear.

    Rvdn 1.0 de2-115-vexriscv32 /dev/console

    de2-115-vexriscv32 login:
Login and setup connection to debug
- Login by typing root without password
- Run ifconfig eth0 192.168.1.50 netmask 255.255.255.0
``` sh
Rvdn 1.0 de2-115-vexriscv32 /dev/console
    de2-115-vexriscv32 login: root
    login[58]: root login on 'console'
    root@de2-115-vexriscv32:~# ifconfig eth0 192.168.1.50 netmask 255.255.255.0
```
Debug application
Currently, rv32imac-xplor-linux-linux64/rv32imac-xplor-linux-win64 is the only toolchain supported. Please change the project settings to use the correct toolchain
Right click on the project then select properties.
In project settings, select
- Architecture: RV32 (-march=rv32i*)
- Floating point: None
- Integer ABI: ILP32 (-mabi=ilp32*)
- Floating point ABI: None
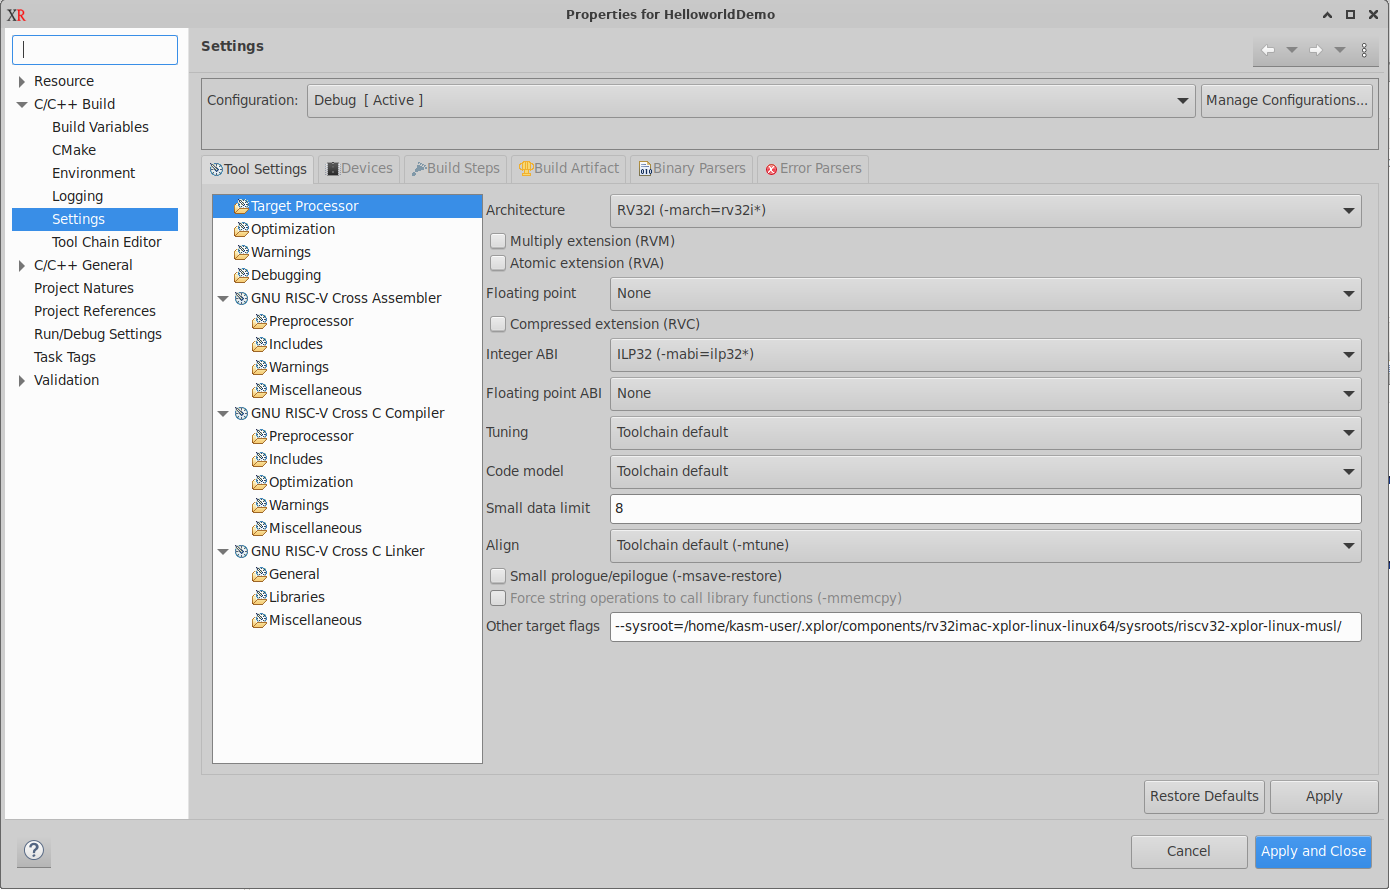
Click Apply and Close
There are some differences when debugging Linux applications, it is necessary to update some config as follows:
On the Debugger tab, select Remote Application by default.

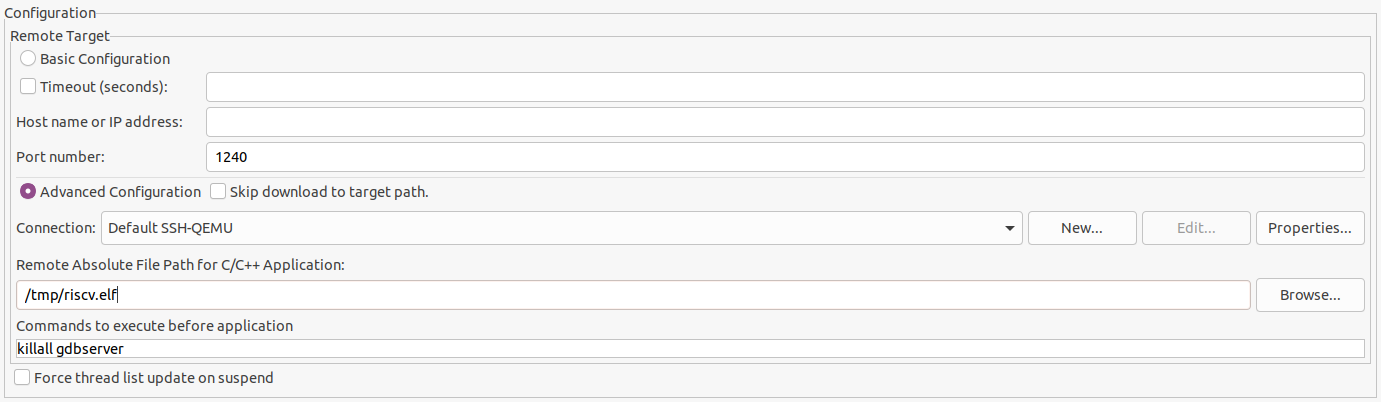
On the Configuration, select “Advanced Configuration”.

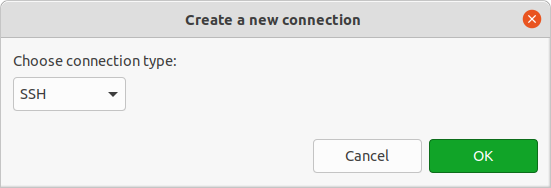
Click the New button to create a new connection configuration, then select SSH as connection type:
On the “New Connection” dialog.
- Connection name: The name of connection
- Host: 192.168.1.50. This is the default IP address of Linux run on board. If you use a different subnet when booting Linux, please update this IP too.
- User: root
- Use password-based authentication: No password
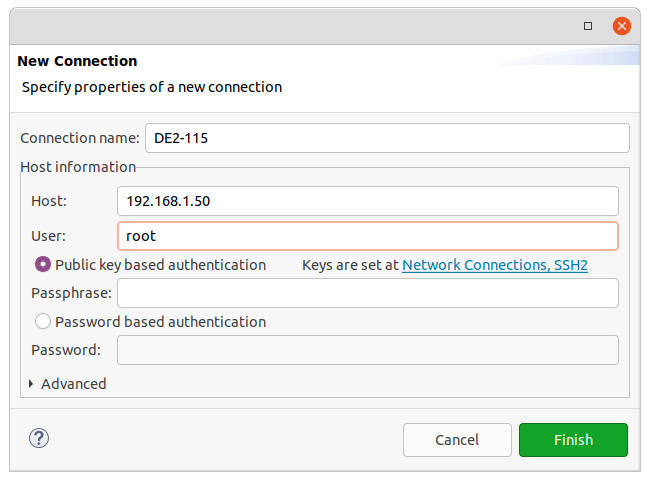
Click Finish to create the connection configuration.
In the Connections dropdown, select the newly created connection name and set the destination file path to copy the application to the board.
On the Remote Absolute File Path for C/C++ Application, enter the path of the elf file that is copied to Linux (ex: /tmp/riscv.elf).
Click Debug to start debugging.
Running and Debugging project with Intel FPGA DE2-115 platform on Windows 10
Hardware and driver preparations
Please refer to the Hardware and Environment Setup document for more details.
Login and setup connection from board to host
After booting Linux successfully,
``` sh
    Starting Dropbear SSH server: Waiting for kernel randomness to be initialised...
    [   14.144009] random: crng init done
    Generating 1024 bit rsa key, this may take a while...
    Public key portion is:
    ssh-rsa AAAAB3NzaC1yc2EAAAADAQABAAAAgQCMeX37iv5Hw5MadvVwd+UIVeSIx1QecoV8OiPOt65obbokDxvaol0PsfCHBi0h23zxhhzUHizKDAu9fJ7gQVLWfHjcGKA4x4XuY8O3TasjnzpAntjXgWcBOpw3zpM46skOl65zfJqq6AIH14IzCqs+VDUE2dKjv+4mRbiX3A5Ovw== root@de2-115-vexriscv32
    Fingerprint: sha1!! 5a:9f:05:35:11:2c:e2:e1:b8:71:a4:8e:f5:a3:8a:1d:76:b6:f2:ff
    dropbear.

    Rvdn 1.0 de2-115-vexriscv32 /dev/console

    de2-115-vexriscv32 login:
```
Login by typing
rootwithout passwordRun
ifconfig eth0 192.168.1.50 netmask 255.255.255.0Rvdn 1.0 de2-115-vexriscv32 /dev/console de2-115-vexriscv32 login: root login[58]: root login on 'console' root@de2-115-vexriscv32:~# ifconfig eth0 192.168.1.50 netmask 255.255.255.0
Now board is ready for debugging application.
Debug application
Create debug configurations and debug are same to Linux.
Notes
Setup environment on Ubuntu
Install rv32-linux-rootfs-vexriscv component
Start/Restart TFTP server (Linux)
    docker rm -f tftpboot
    cd $HOME/.xplor/components/rootfs-vexriscv-de2115/
    docker run -itd --name=tftpboot --net=host  --restart=always -v ${PWD}:/var/tftpboot  pghalliday/tftp
Configure IP address for DE2-115 board:
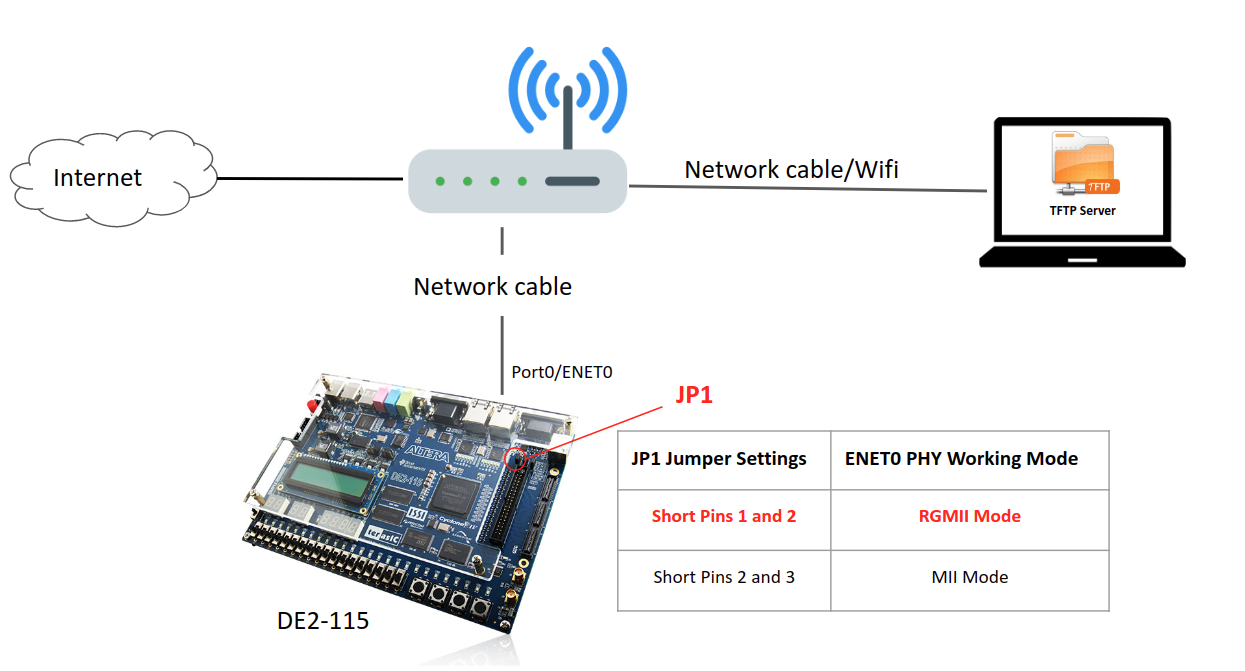
The DE2-115 board has 2 configurations for ethernet: RGMII mode and MII mode. Depending on the speed of link (1000Mbps or not), please choose a suitable mode for the board to run/debug applications.
RGMII mode:
- Network interface on the host PC connects to ETHERNET0 of DE2-115. The connection could be directly or via router/switches.
- On the board, set Jumper JP1 to pins 1 and 2. It’s default mode (RGMII mode).
- Default IP addresses:
- DE2-115 board: 192.168.1.50
- TFTP server: 192.168.1.100
On the PC, the IP address is set to 192.168.1.100. If users want to use a different subnet, please update the IP of the board.
To update the IP of the board, after programming FPGA bitstream, open the
/dev/ttyUSB*orCOM*port console to the board and set the IP as:Command Usage eth_local_ip Set the IP address of the board eth_remote_ip Set the expected IP of the TFTP Server to download kernel/rootfs for network booting netboot Start booting Linux from the network 
MII mode:
- Network interface on the host PC connects to port 0 of DE2-115.
- Connection speed is 10 Mpbs.
- On the board, set Jumper JP1 to pins 2 and 3 (to config Ethernet port 0 to run on MII mode).
- On the PC, the IP address is set to 192.168.1.100. The network speed and IP can be set with the following command:
# Assume that the network interface is enxf8e43b5dd64a
NIC=enxf8e43b5dd64a
sudo ethtool -s $NIC speed 10 duplex full autoneg off
# Double check
ethtool $NIC
# IP needs to be fixed as 192.168.1.100
# Make sure that IPv4 method is manual
sudo ifconfig $NIC 192.168.1.100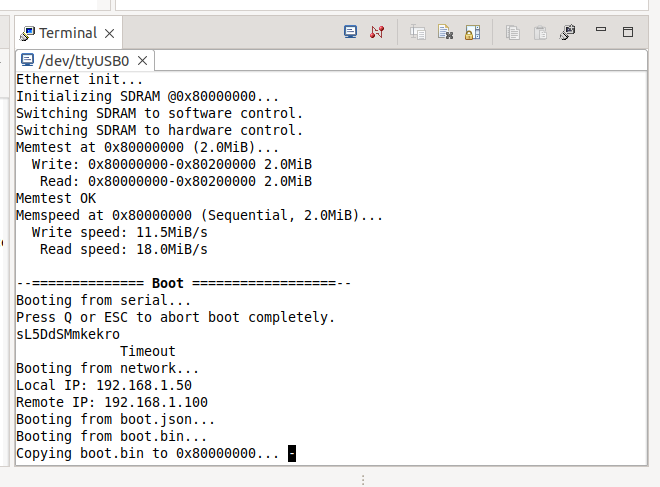
On the PC, the IP address is set to 192.168.1.100. If users want to use a different subnet, please update the IP of the board.
Netboot/Reboot Linux Then setup IP address (if needed) and run
netbootin Litex console or re-program Bitfile.
Setup environment on Windows 10/11
Setup SolarTFTP server on Windows 10
Prerequisites
Administrator permission
SolarWinds TFTP Server: To set up a TFTP server, users will have to download the TFTP Server utility such as SolarWinds can be downloaded from https://www.solarwinds.com/free-tools/free-tftp-server. Once the .zip file is downloaded, extract it and go through the straightforward installation.
Firewall setup: To allow remote access to the TFTP server, users need to open the firewall for TFTP service.
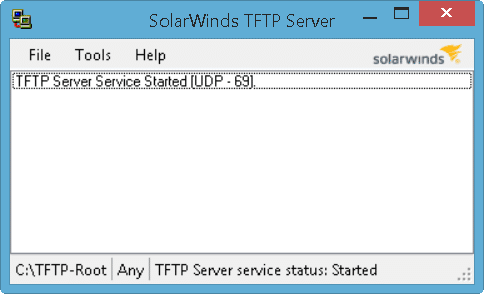
Start the TFTP Server
Run the SolarWinds TFTP Server utility by going to the Start Menu and searching for TFTP Server.
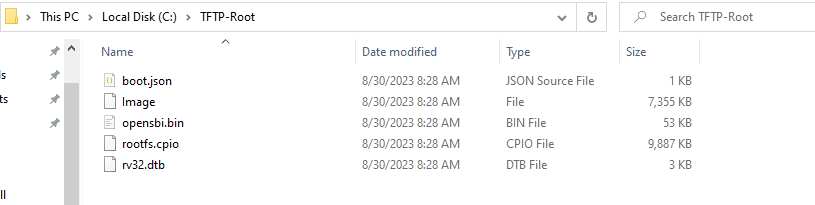
Once it loads up, copy all the file in rootfs-vexriscv-de2115/ folder to C:\TFTP-Root folder.
Update IP of TFTP server
Go to *Network and Internet settings by click on 

As image, there are 2 networks:
- The `Ethernet 3` for connecting to Internet
- The `Ethernet` for connecting to DE2-115 Board
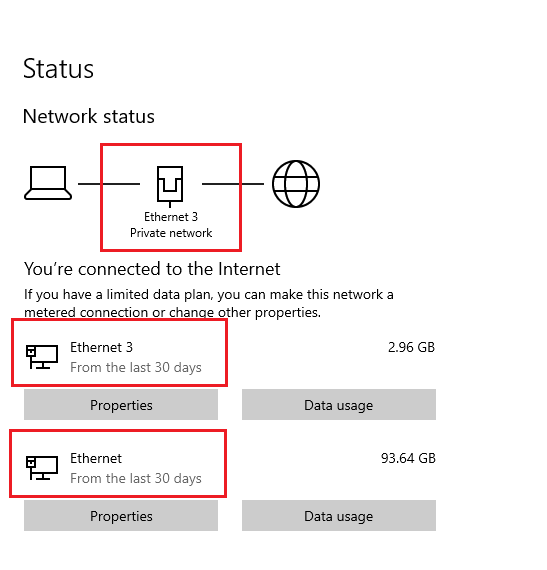
Click on Properties on Ethernet:

Now we need to setup IP manually bt click on Edit button, choose Manual , type as image and Save
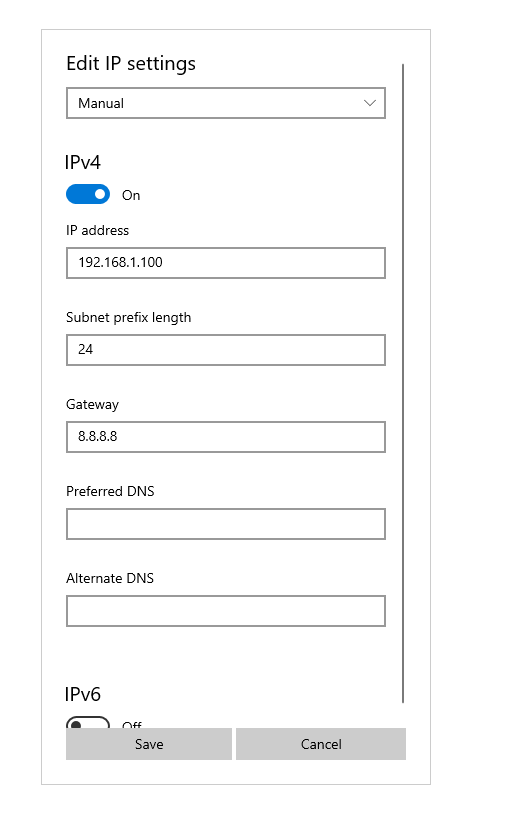
After that, restart the SolarTFTP server and programming Bitfile again.
If Serial Terminal stills show Network boot failed, please try to turn off your Windows Firewall and reprogram Bitfile.
Common errors
Feedback
Was this page helpful?
Glad to hear it! Please tell us how we can improve.
Sorry to hear that. Please tell us how we can improve.